Wavestack Kubernetes Engine
Wavestack Kubernetes Engine (WKE) implements the automated management and operation of Kubernetes clusters as a service.
WKE is build using Gardener and you can find additional information in their documentation.
Please note that WKE is currently in the tech-preview phase and has not been releases as GA.
We are happy for you to try WKE, but you should be aware that we cannot offer SLAs on this product yet.
Overview
This guide walks you through creating, accessing, and using a Kubernetes cluster using WKE.
Specifically, you will learn how to:
- Create a new Kubernetes cluster
- Access a cluster using kubectl
- Deploy a workload
- Delete a cluster
Prerequisites
In order to follow this guide, the following tools have to be installed:
Compatibility
The steps in this guide have been tested with the following versions:
| Version | |
|---|---|
| kubectl | v1.27.3 |
| gardenlogin | v0.4.0 |
| kubelogin | v1.27.0 |
Access the dashboard
You can log into the Gardener dashboard with your Wavestack account.

Additional documentation can be found in the Gardener Dashboard Documentation.
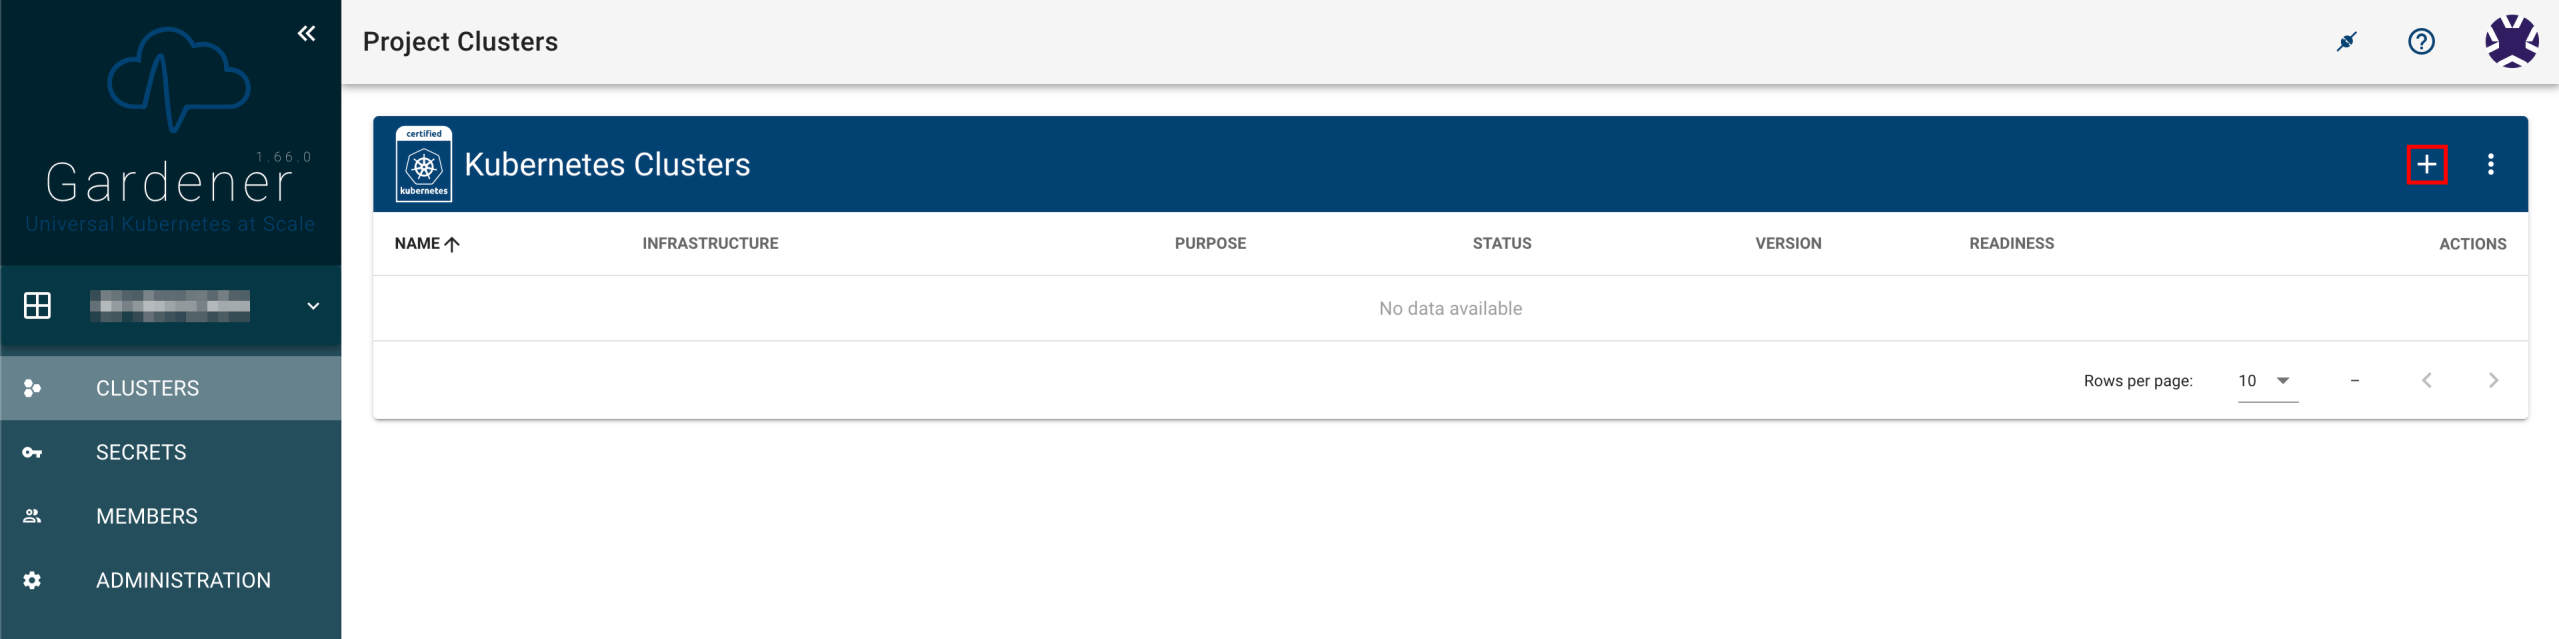
Create a cluster
Click the + button at the top to start the creation of a new Kubernetes cluster or shoot in Gardener parlance.
Please note that application credentials for WKE are not automatically provisioned at this point.
In order to be able to create clusters and other resources, you will have to create a suitable application credential and provide it to WKE.
To do so, head over to:
and create a new application credential.
Once you’ve done that you can provide it to WKE by configuring an infrastructure secret on:
Configuration
The cluster configuration wizard allows you to tailor the cluster configuration to your needs.
Gardener Resources
Please note that you can edit the generated Gardener custom resources directly by clicking on the YAML tab. This allows you to specify settings that are not available in the configuration wizard.
A specification of these resources can be found in the Gardener API Reference.
Infrastructure

Gardener supports multiple providers, specifically:
- aws - Amazon Web Services
- azure - Microsoft Azure
- openstack - Wavestack
Cluster Details

The cluster details section allows you to customise various cluster specific settings.
Cluster name
Gardener will generate a random default name for your new cluster or you can define one yourself.
Kubernetes version
New clusters can be created using a number of different Kubernetes versions. It is recommended to always use the newest release unless you have reasons not to.
An overview of current Kubernetes releases can be found on:
Cluster purpose
This setting denotes the intended purpose or level of production readiness of the cluster.
Please refer to shoot purposes for further information on differences in the way the shoot clusters are set up based on the selected purpose.
Infrastructure Details

Secret
This secret will be used by Gardener and the Kubernetes Cloud Controller Manager when interacting with the underlying cloud provider.
Region
Choose a suitable region for your new cluster.
Networking Type
Kubernetes cluster networking can be easily customised by selecting a suitable Container Network Interface (CNI) for your use case.
Wavestack currently supports the following:
Worker Groups

Machine Type
Select the flavor that will be used for your worker node. Wavestack follows Sovereign Cloud Stack standards for instance naming:
Autoscaling
Every cluster that has at least one worker group with minimum < maximum nodes will get a suitably configured
autoscaler deployment, which allows
Gardener to dynamically scale the number of worker nodes in line with
demand.
The Gardener autoscaler is a fork of the Kubernetes cluster-autoscaler, with additional support for gardener/machine-controller-manager.
Maintenance

Gardener configures a time window for automated cluster update tasks. You can configure Gardener to perform the following updates automatically:
- Kubernetes patch releases (control plane and worker nodes)
- Worker node machine images
If you want to learn more about this refer to shoot maintenance in the Gardener documentation.
Hibernation

Some clusters are not required to run all the time and Gardener allows you to automatically scale-down all cluster resources to zero by configuring a hibernation schedule.
Creation
Create the cluster by clicking Create in the bottom right corner.
You should see the new shoot bootstrapping in the list of clusters. This process can take several minutes.

Quotas
Note that the creation of cluster resources is subject to quotas on your Wavestack project. You should make sure that you choose suitable worker node instance types (i.e. flavors) to ensure that you stay within your quotas.
Get in touch with wavestack-support@wavecon.de if you require a quota increase.
Access a Cluster
Once your new cluster has finished bootstrapping, you can configure access to it via kubectl.
Gardener supports secure authentication via OIDC with gardenlogin and kubelogin.
Configure gardenlogin
Create ~/.garden/gardenlogin.yaml with the following content:
gardens:
  - identity: wavestack
    kubeconfig: ~/.garden/gardenctl-v2.yaml
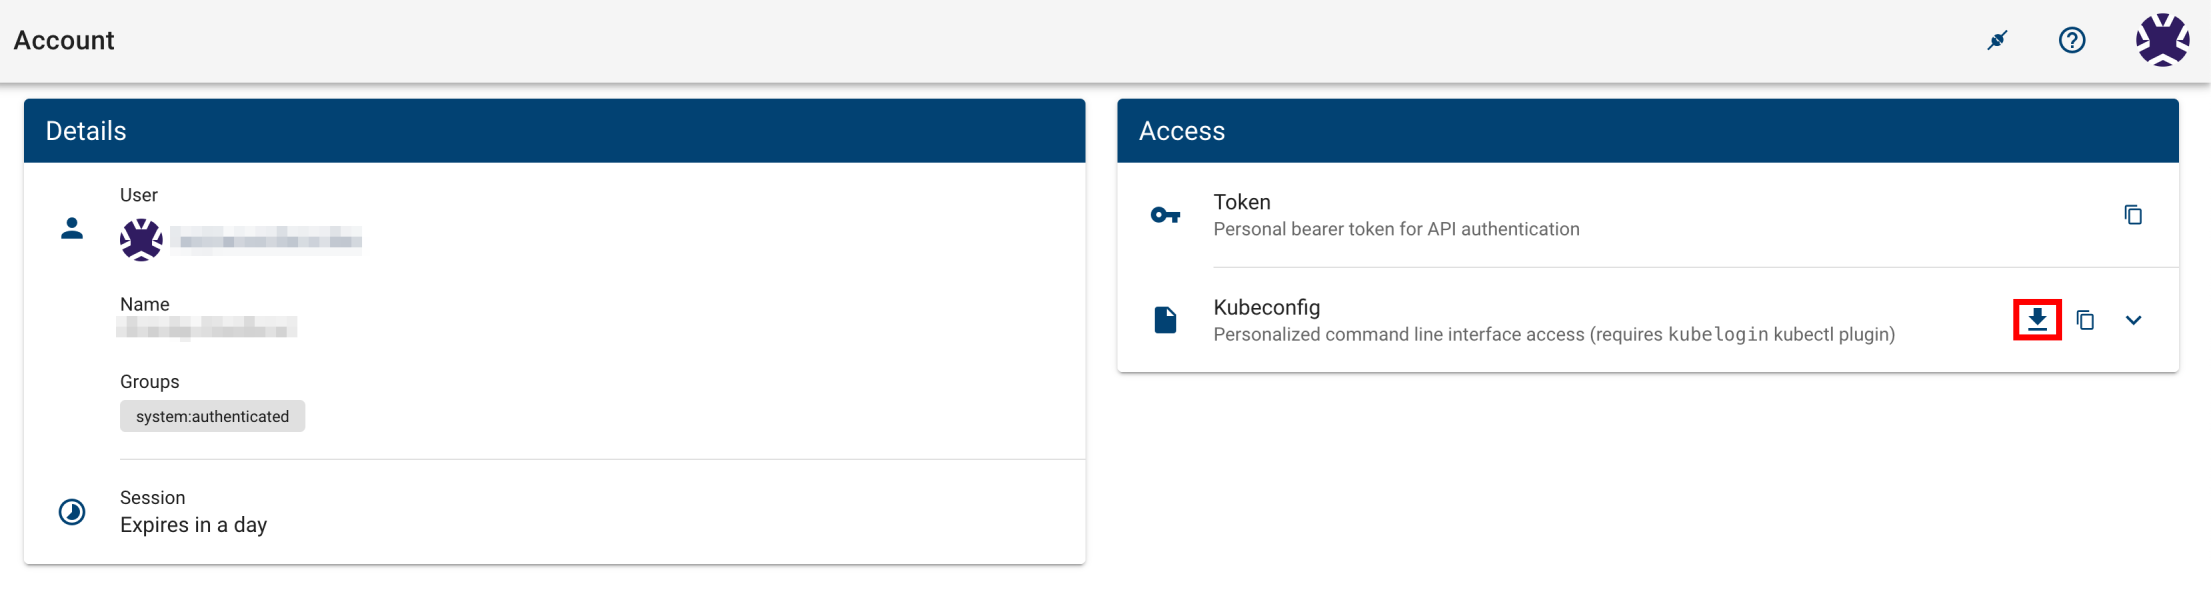
Navigate to your account on the Gardener
dashboard and download the kubeconfig to the garden cluster. Save it as
~/.garden/gardenctl-v2.yaml.
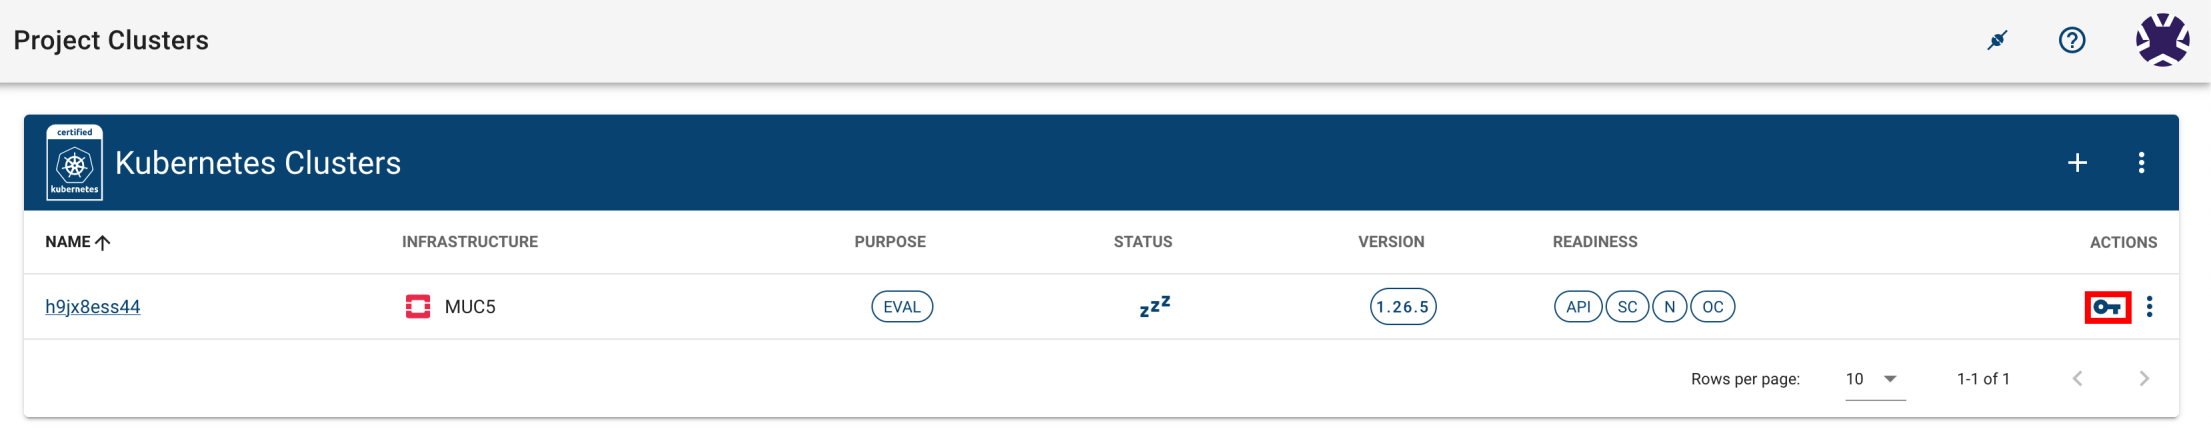
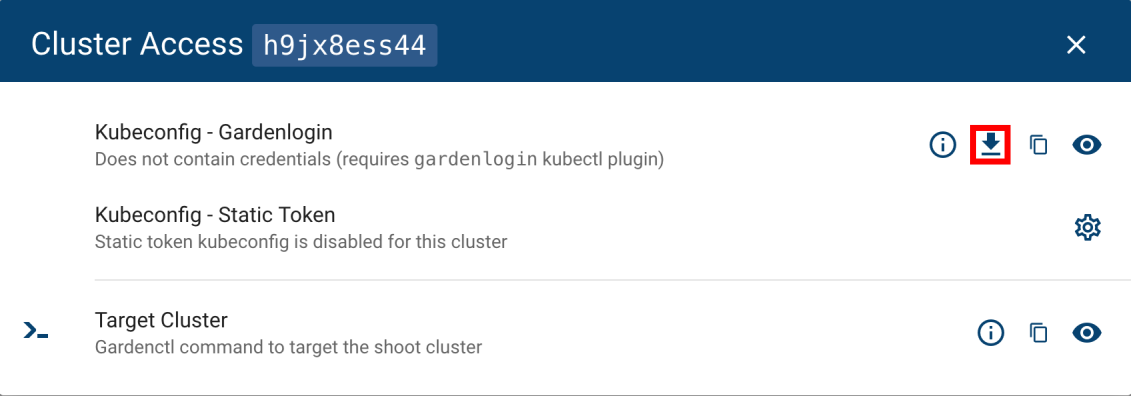
Use kubectl
The kubectl command can be
configured to access clusters
using kubeconfig files. You can download suitable ones files for
your clusters from the cluster overview
page by clicking on the key symbol.
Download the Kubeconfig - Gardenlogin file.
The file will be named similar to
kubeconfig-gardenlogin--<project_id>--<cluster_name>.yaml. Save the downloaded
file in the ~/.kube/ directory.
You can either rename it to ~/.kube/config if you will only ever
manage a single cluster, or configure
kubectl to use a specific one by
setting KUBECONFIG environment variable.
❯ export KUBECONFIG=~/.kube/kubeconfig-gardenlogin--<project_id>--<cluster_name>.yaml
Check your available nodes by running:
❯ kubectl get nodes
NAME                                                        STATUS   ROLES    AGE   VERSION
shoot--d51qb1zx3h--h9jx8ess44-worker-wwug5-z1-75d64-7hwx2   Ready    <none>   14m   v1.26.5
shoot--d51qb1zx3h--h9jx8ess44-worker-wwug5-z1-75d64-j6mm4   Ready    <none>   14m   v1.26.5
Deploy a Workload
Create a Deployment
Use the kubectl create command to create a simple Deployment that
manages a Pod running the agnhost image.
❯ kubectl create deployment hello-node --image=registry.k8s.io/e2e-test-images/agnhost:2.43 -- /agnhost netexec --http-port=8080
deployment.apps/hello-node created
View the deployment:
❯ kubectl get deployments
NAME         READY   UP-TO-DATE   AVAILABLE   AGE
hello-node   1/1     1            1           51m
Create a Service
Expose the Pod to the public internet using the kubectl expose command:
❯ kubectl expose deployment hello-node --type=LoadBalancer --port=8080
service/hello-node exposed
The --type=LoadBalancer flag indicates that you want to expose your
Service outside of the cluster and triggers the creation of a load
balancer.
View the newly created Service:
❯ kubectl get services
NAME         TYPE           CLUSTER-IP      EXTERNAL-IP   PORT(S)          AGE
hello-node   LoadBalancer   100.98.31.115   <pending>     8080:31058/TCP   5s
kubernetes   ClusterIP      100.96.0.1      <none>        443/TCP          18h
You can see that the external IP of the service is still <pending>
while the load balancer is being provisioned.
Once the provisioning has finished, the Service status will be updated:
❯ kubectl get services
NAME         TYPE           CLUSTER-IP      EXTERNAL-IP      PORT(S)          AGE
hello-node   LoadBalancer   100.98.31.115   31.172.116.232   8080:31058/TCP   2m4s
kubernetes   ClusterIP      100.96.0.1      <none>           443/TCP          18h
You can test the service by running the following command:
❯ curl http://31.172.116.232:8080
NOW: 2023-06-27 06:51:28.925024573 +0000 UTC m=+144.187462730
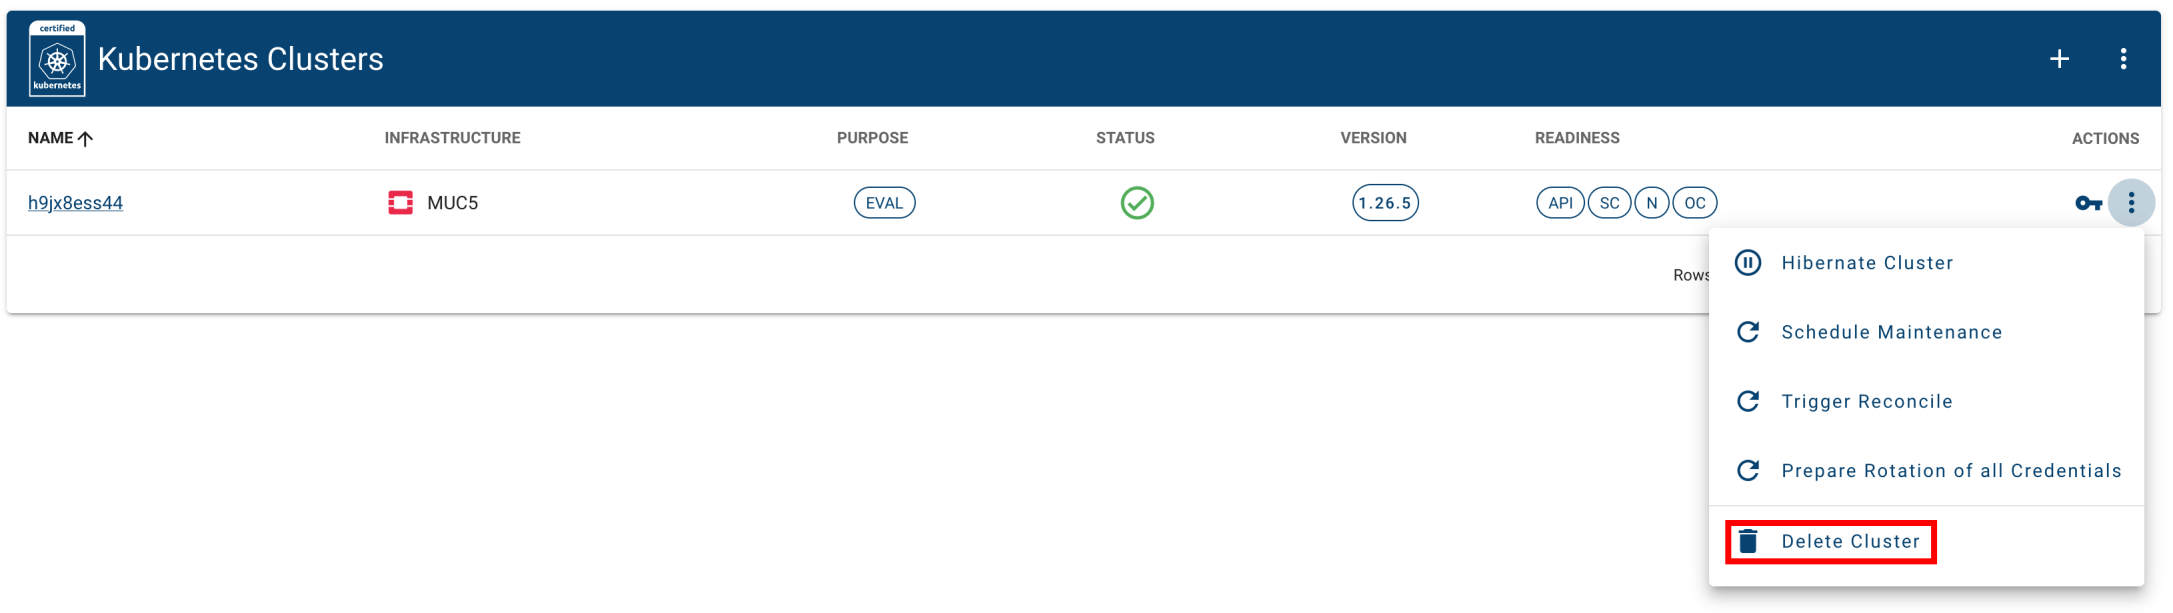
Delete a Cluster
You can delete clusters by clicking on the three dots to the left on the cluster overview and choosing Delete Cluster