Creating your first Compute Instance via the horizon ui
Together We will build a network with a router and connect an instance to it. This is only a very simple getting started introduction to get a grasp of how to handle those utilities. We will use the Wavestack dashboard.
Introductory
Cloud computing resembles the classical way like with real hardware but it’s all virtual now. We start with a blank environment which we will guide you to fill and configure. The fundamental concepts of a classical / physical environment basically remain the same but the wording and handling differ at some points.
| Classical term | OpenStack Cloud term | Description |
|---|---|---|
| Virtual Machine | Compute Instance or short: Instance | A computer system that is virtualized |
| Network | Network | A network. In physical environments there are switches, in OpenStack they are virtual and transparent to the user |
| Router | Router | A device that connects network segments |
| Firewall rule | Security Group | Controlling what traffic is allowed to pass in or out of a router |
| Floating IP | Floating IP | An IP address that is public and can be addressed from the Internet. It is kind of a virtual IP (floating) as it is fully managed by the virtual router. Floating IPs are mapped (1:1) to an internal compute instance. |
Working with IP addresses in OpenStack is also somewhat different. There is a default resource called external containing a pool of public IP addresses you can use. In order for you to use them properly they will be mapped 1:1 to an internal IP of your instance. That way a host can be fully accessible from the internet, even though the actual compute instance only has an internal IP address. Yet this mapping has to be configured manually by using a floating IP. By default an instance is not reachable from the Internet in any way.
Overview
Overview of the steps we will take in the given order:
- Creating a Network + Subnet
- Creating a Router
- Creating a Security Group
- Creating an SSH keypair
- Creating a Compute Instance
- Connect it to the Internet
- Connect via SSH
Network overview
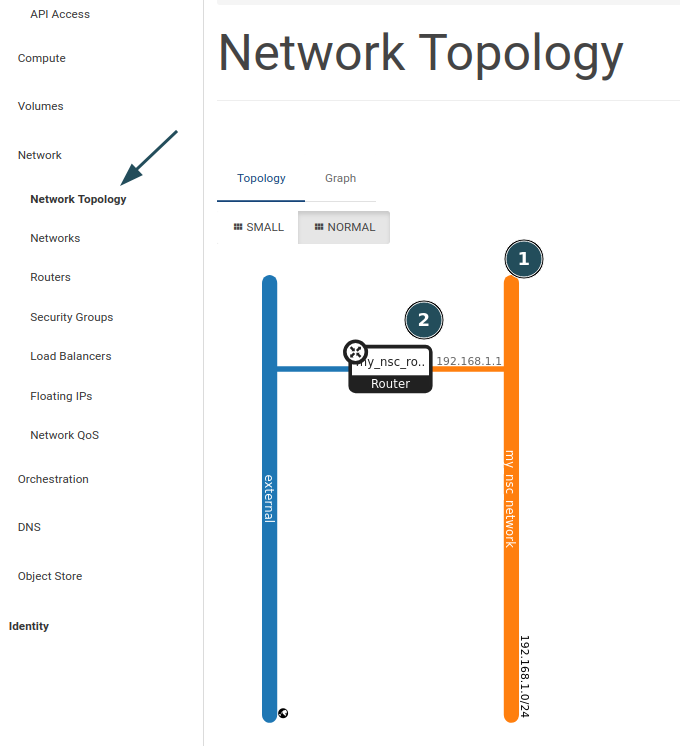
First we need to build up a (virtual) network. The compute instance will become part of that network as well as the router.
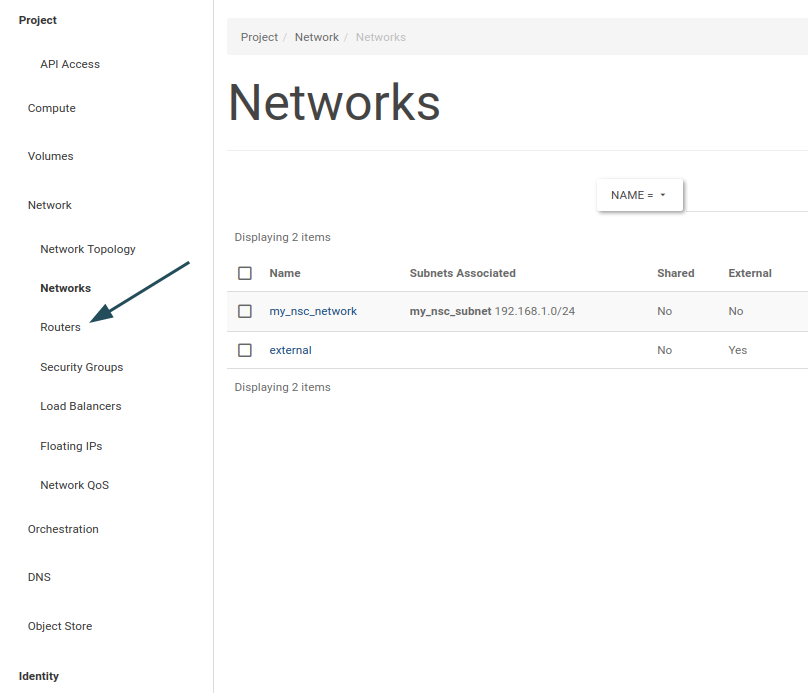
Below image depicts what we’re building during first steps. Visually verify in Network Topology view under Network. First we will create an internal network (here: my_nsc_network). Secondly a router will be created, connected to both nets.
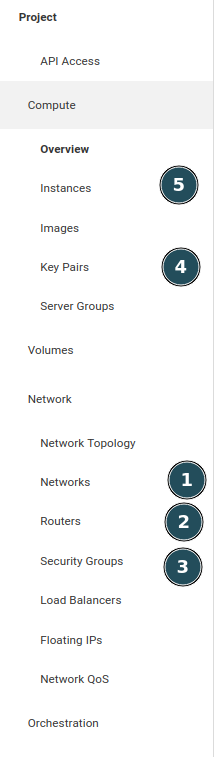
Creating a Network + Subnet (1)
Go to Network -> Networks
Hit CREATE NETWORK.
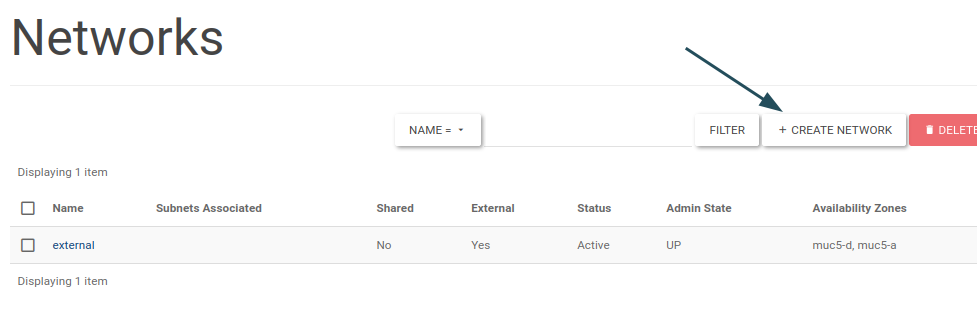
Give your network a name. For this guide we will call it my_nsc_network which will be our local net.
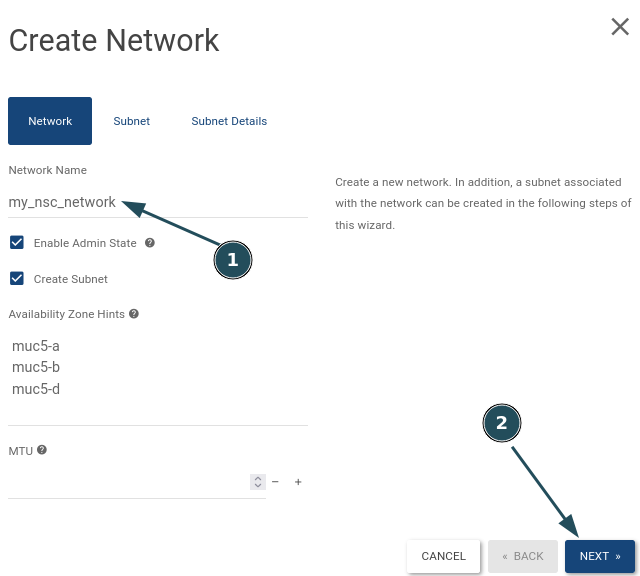
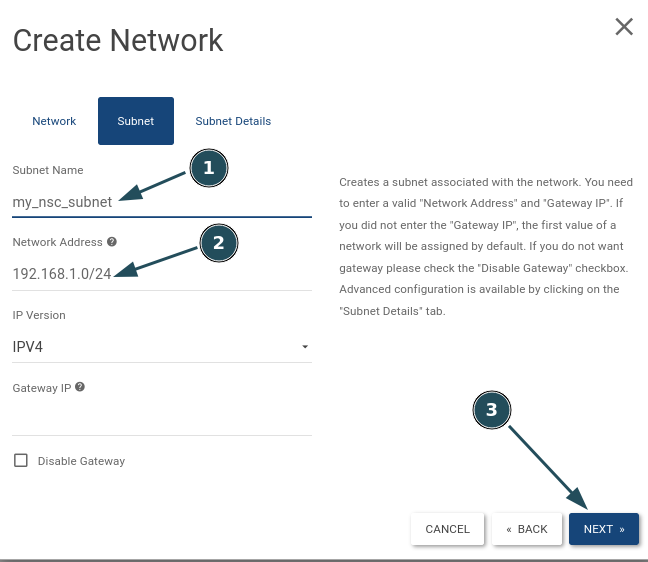
Enter the subnet’s name and define a subnet range to work with. Stick to IPv4 only as IPv6 support is yet to come.
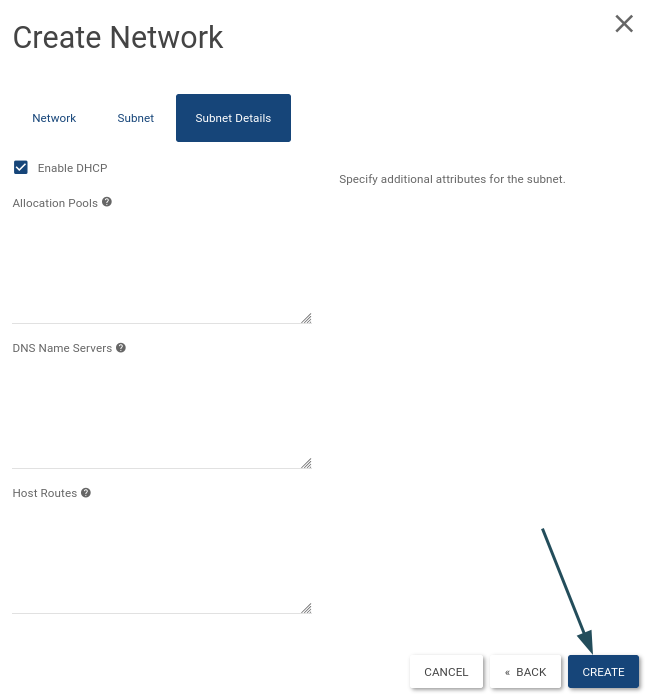
Leave Enable DHCP checked and hit CREATE.
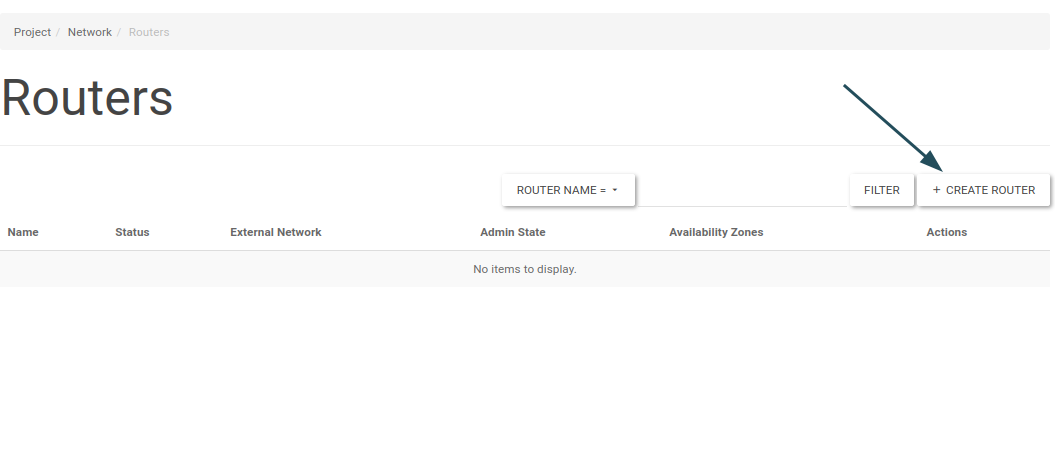
Creating a Router (2)
Navigate to Network -> Routers.
CREATE ROUTER
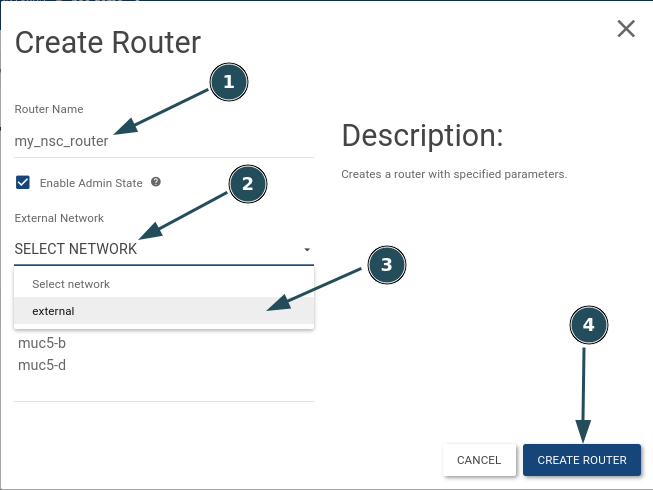
Choose a name and select the external network under External Network. Finalize by clicking CREATE ROUTER.
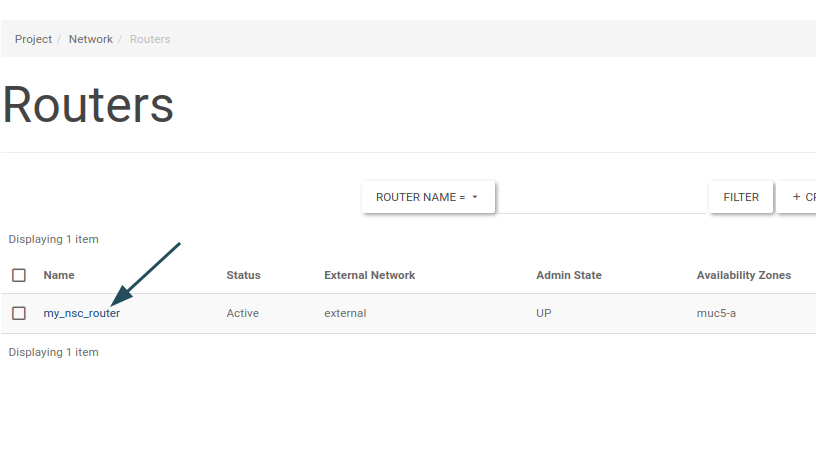
The virtual router instance will now be listed, click its name.
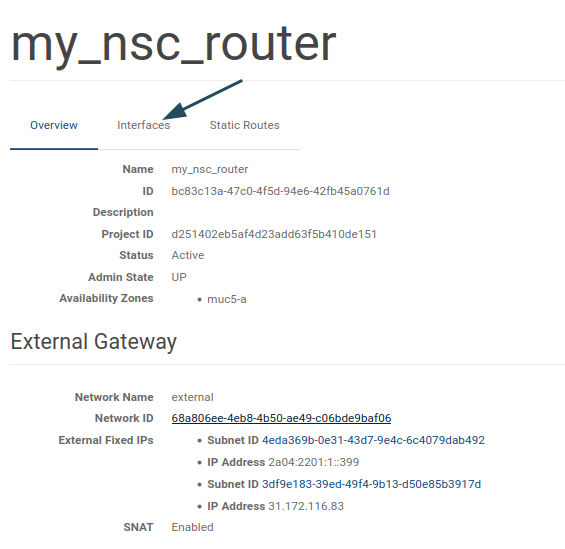
Navigate to the Interfaces tab.
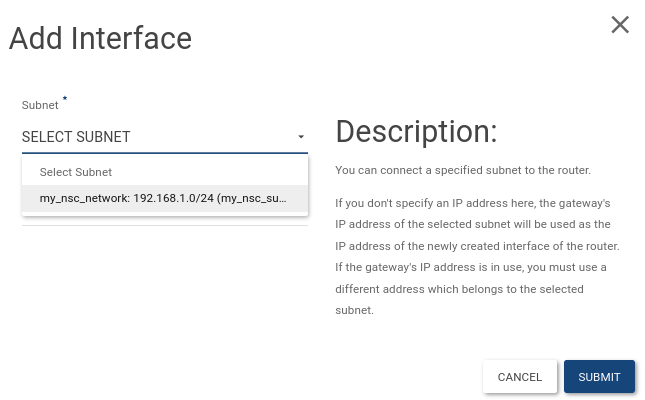
Click ADD INTERFACE.

In the dropdown choose our local network.
Create a Security Group (3)
By default inbound traffic is restricted. In order to open up SSH access we will create and apply a security group.
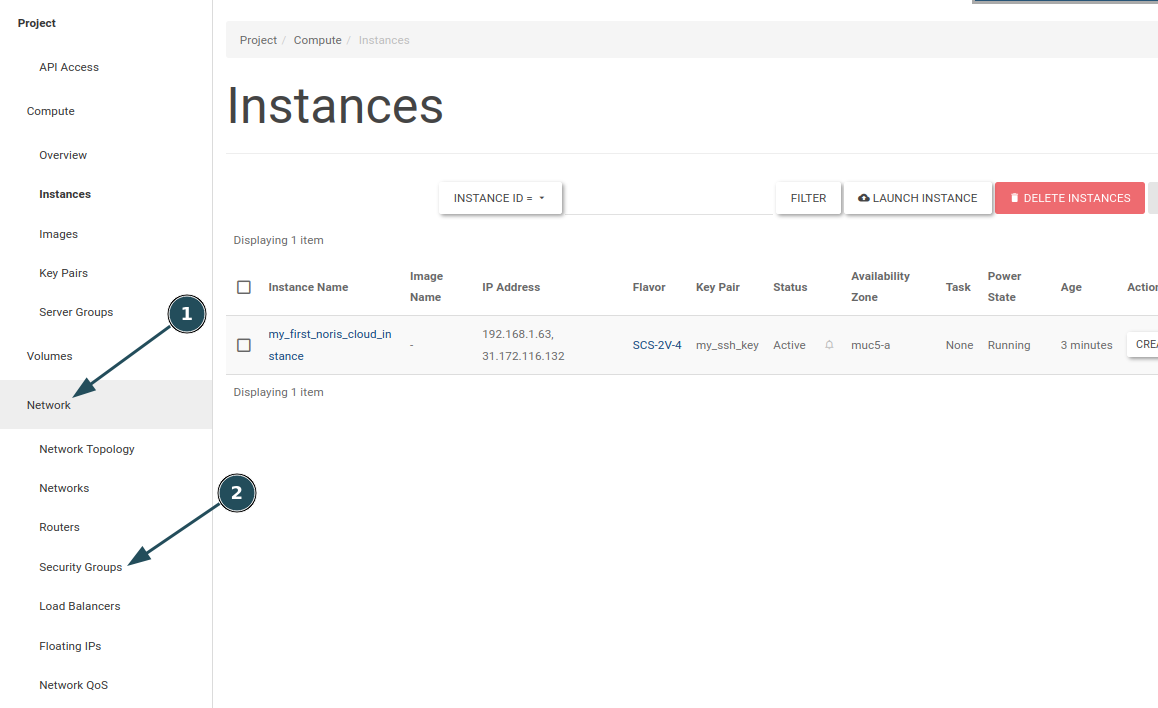
Navigate to Network -> Security Groups.
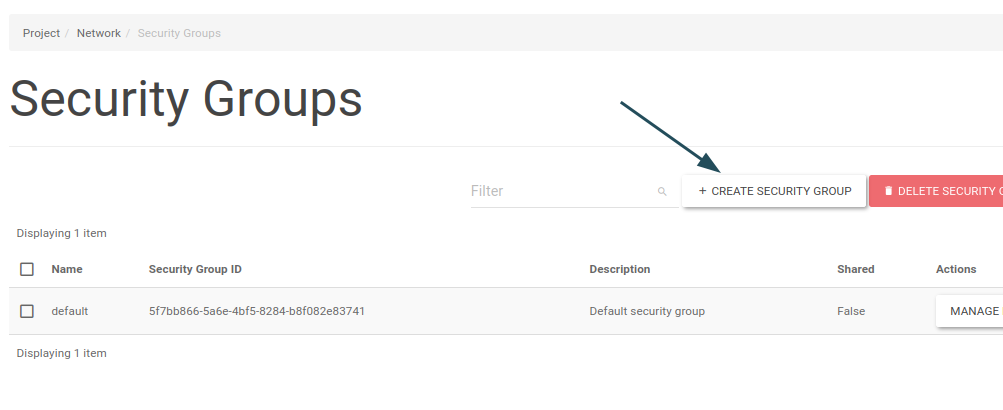
CREATE SECURITY GROUP
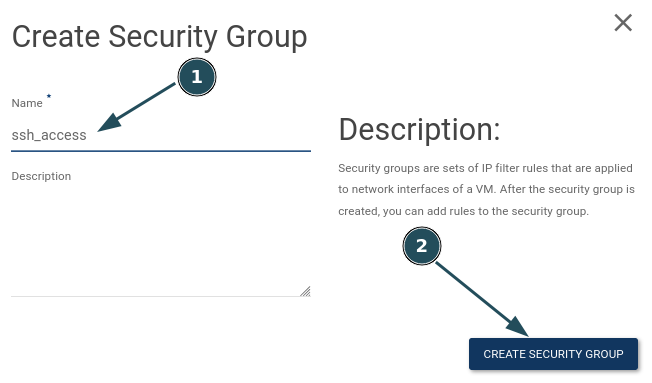
Give it a decent name.
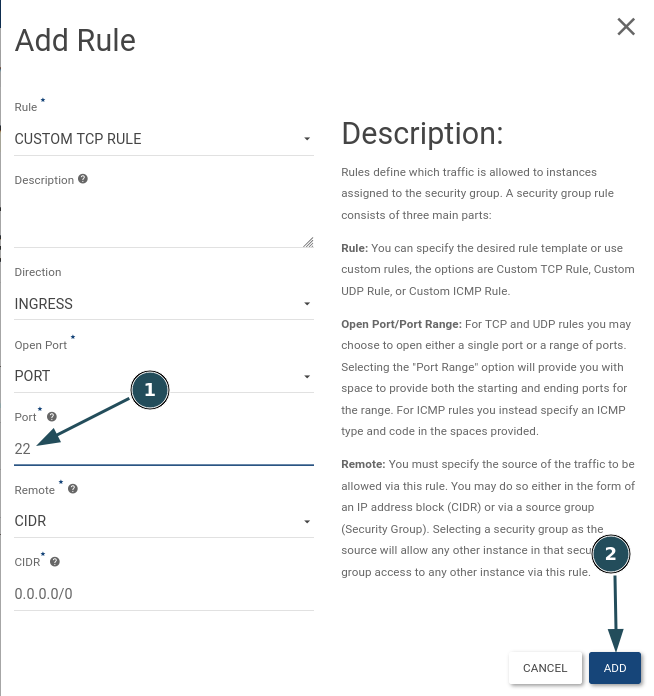
ADD RULE
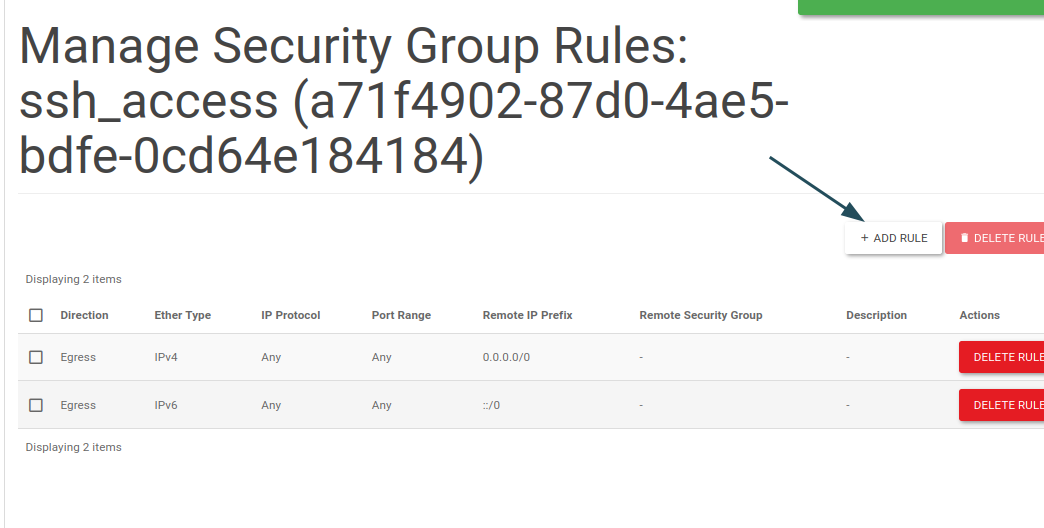
Enter port number 22 and hit ADD.
Creating an SSH keypair (4)
SSH authentication will be password less via key so we will have to setup key based authentication. If you have a private key already adjust the steps accordingly by using the IMPORT PUBLIC KEY button instead of CREATE KEY PAIR and continue with (5) Create Compute Instance.
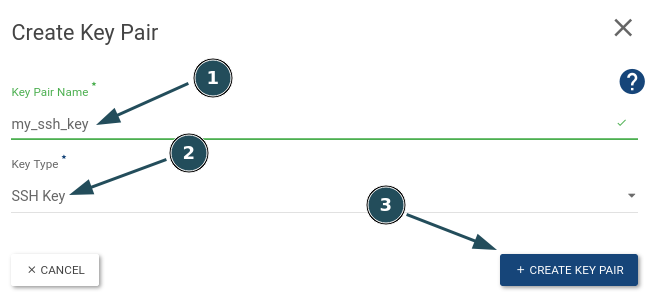
Navigate to Compute -> Key Pairs and click CREATE KEY PAIR.

Choose a decent name and select SSH Key in the dropdown menu. Finalize by clicking CREATE KEY PAIR. The data will automatically be download through your browser.
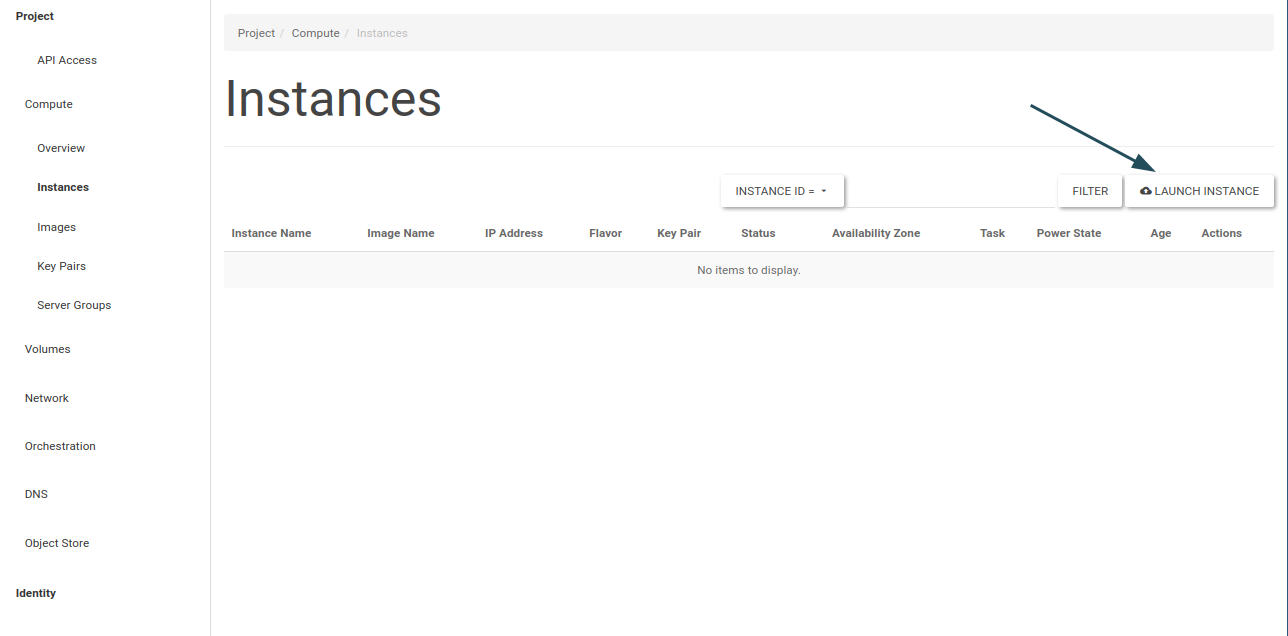
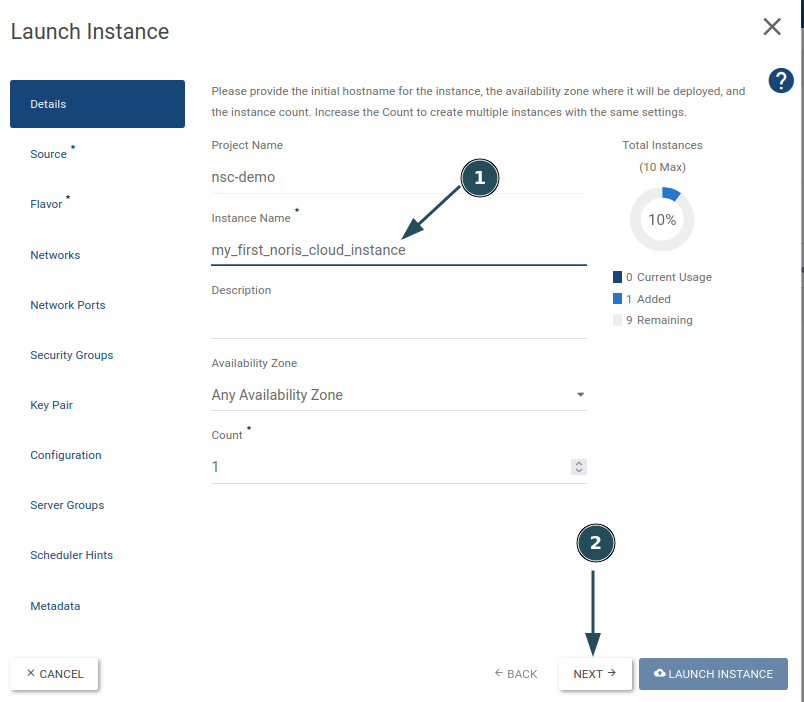
Create a Compute Instance (5)
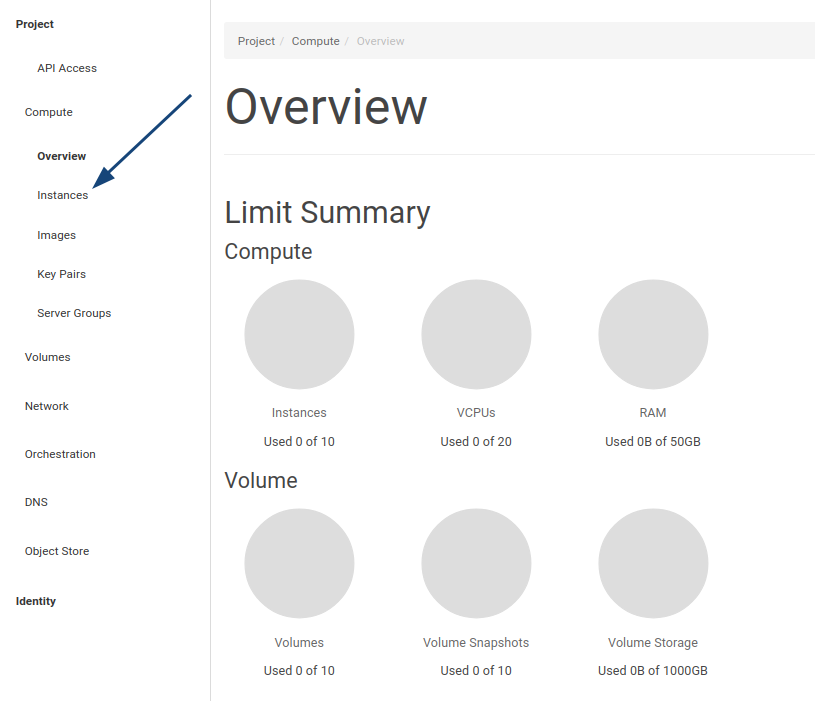
Navigate to Compute -> Instances.
LAUNCH INSTANCE.
Choose a name and hit NEXT.
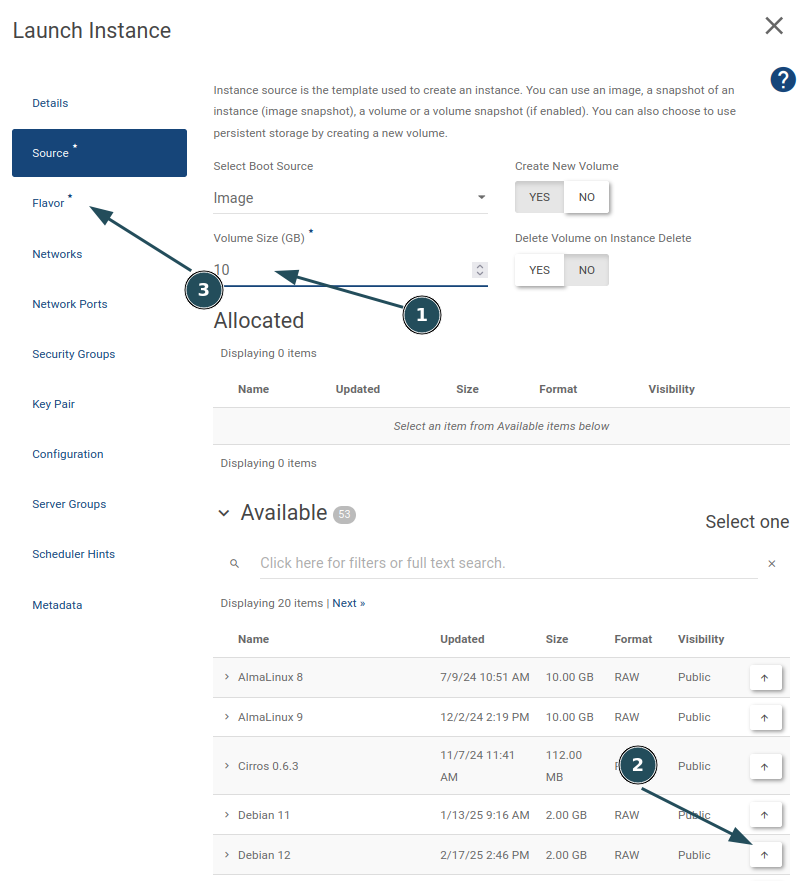
Enter desired storage capacity and choose your OS image. Next go to Flavor.
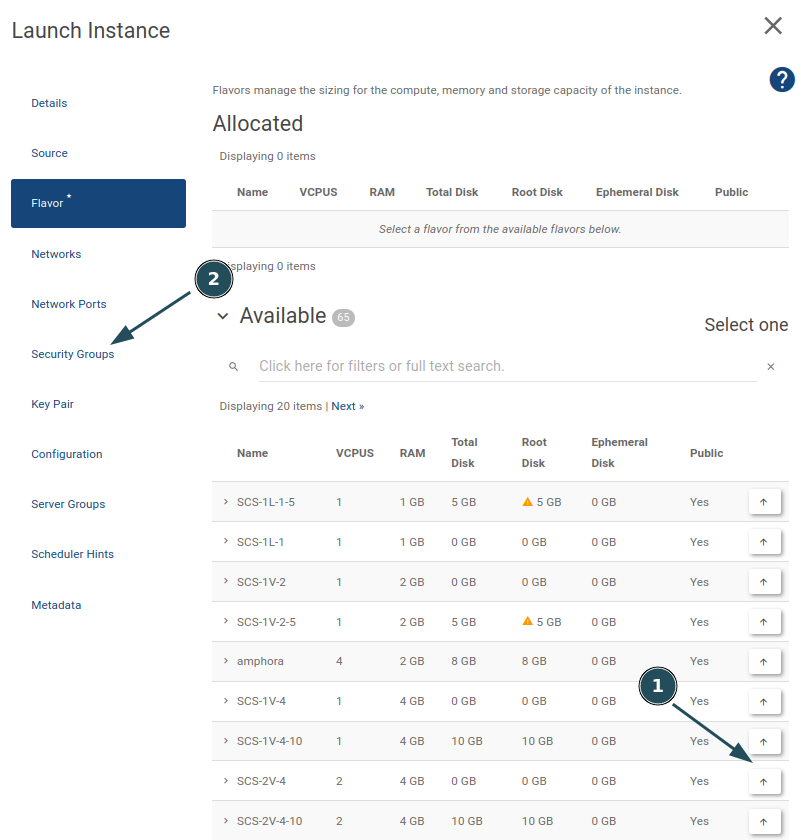
The flavor will determine what resources your virtual cloud machine will have. Arrange according to your quotas and host requirements. Click on Security Groups.
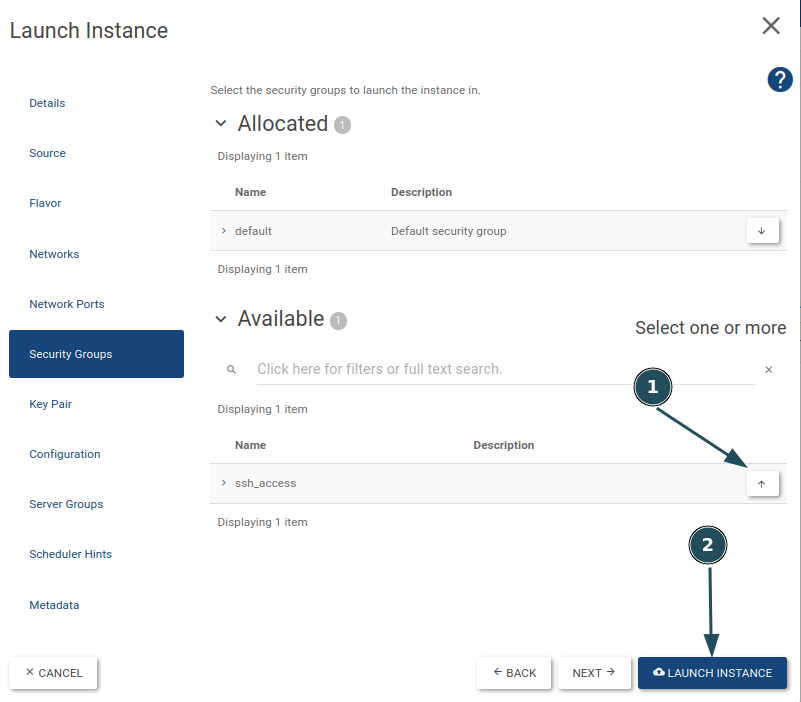
Choose the security group for SSH access we created earlier.
Connect it to the Internet (6)
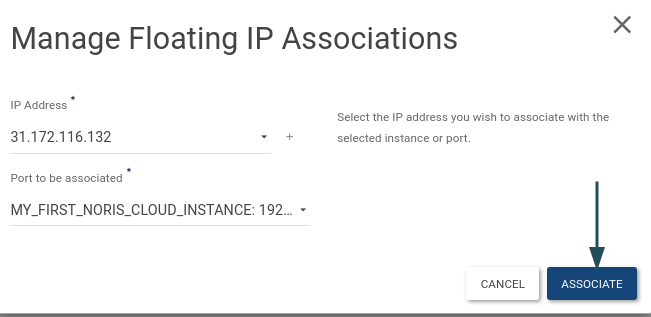
Your compute instance will be associated with a floating IP. It will be drawn from the prebuilt external network and make your instance publicly routable. As long as you don’t release this IP it will remain yours.
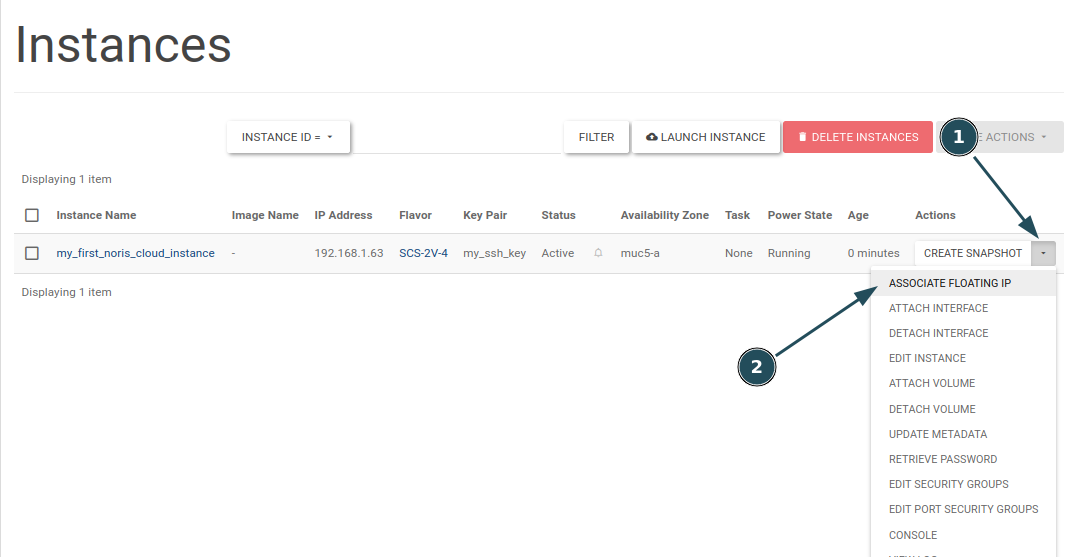
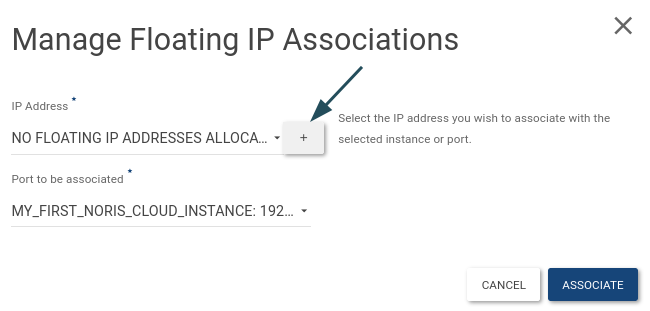
In the dropdown menu of your compute instance select ASSOCIATE FLOATING IP.
Hit the plus button.
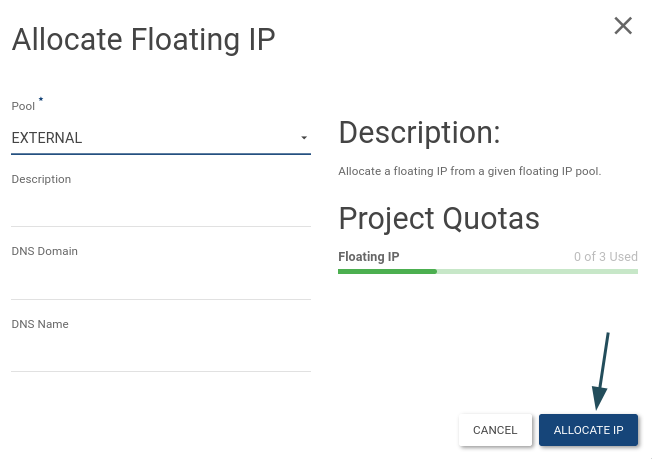
ALLOCATE IP
ASSOCIATE
Connect via SSH (7)
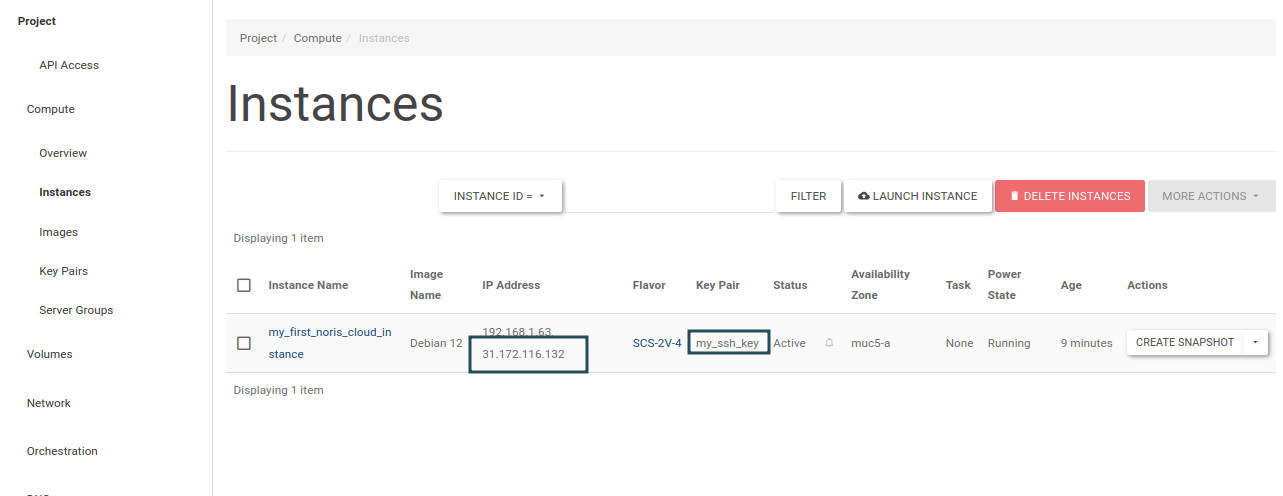
In the Instances view you should now see the floating IP as well as the Key pair.
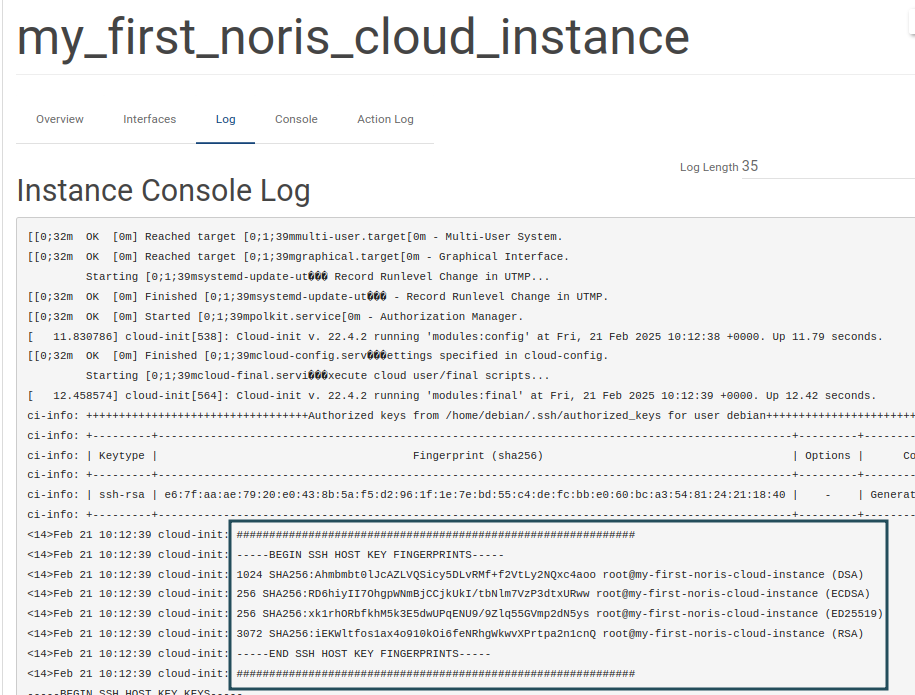
When you click your Instance go to Log. You can see the host’s fingerprint. When you connect to your host via SSH compare and verify for security reasons.
We will now move and rename the SSH key downloaded earlier. Then we use it via the -i.
user@localhost $ mv ~/Downloads/my_ssh_key.pem ~/.ssh/id_rsa_nsc
user@localhost $ chmod go= ~/.ssh/id_rsa_nsc
user@localhost $ ssh -l debian -i ~/.ssh/id_rsa_nsc 31.172.116.132
The authenticity of host '31.172.116.132 (31.172.116.132)' can't be established.
ED25519 key fingerprint is SHA256:xk1rhORbfkhM5k3E5dwUPqENU9/9Zlq55GVmp2dN5ys.
This key is not known by any other names.
Are you sure you want to continue connecting (yes/no/[fingerprint])? yes
Warning: Permanently added '31.172.116.132' (ED25519) to the list of known hosts.
Linux my-first-noris-cloud-instance 6.1.0-28-cloud-amd64 #1 SMP PREEMPT_DYNAMIC Debian 6.1.119-1 (2024-11-22) x86_64

The programs included with the Debian GNU/Linux system are free software;
the exact distribution terms for each program are described in the
individual files in /usr/share/doc/*/copyright.

Debian GNU/Linux comes with ABSOLUTELY NO WARRANTY, to the extent
permitted by applicable law.
Last login: Fri Feb 21 16:35:57 2025 from 62.128.1.62
debian@my-first-noris-cloud-instance:~$
CONGRATULATIONS You have now full control over your cloud based compute instance.🎉